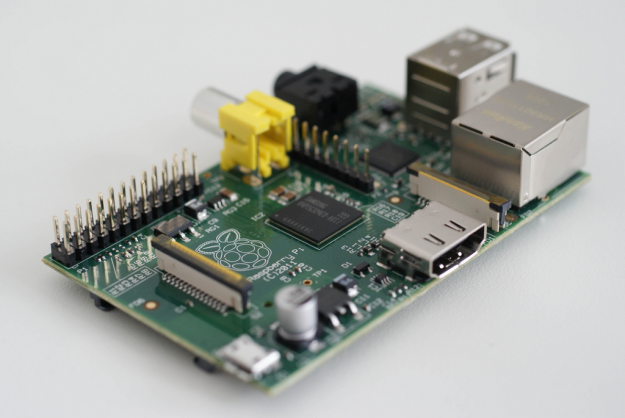
Basic Setup Raspberry Pi

OS setup
If your Raspberry Pi didn’t come with an SD card and installed OS, this is how to do:
- Go to: http://sourceforge.net/projects/win32diskimager/ and download Win32Diskmager.
- Go to: http://www.raspberrypi.org/downloads and download recommended distribution.
Insert SD card in a windows machine and use Win32Diskmager to install downloaded distribution image.
Raspberry Pi Setup
These days when you start up the Rasp for the first time, you will be directed to the Raspi-config.
- The first you should do is “Configure Keyboard” if you don’t live in the UK. Select marked “Generic 105-key”, then other. I live in Sweden therefore I’ll choose Swedish.
- Change password to something else than “raspberry” (safer that way).
- Change locale, I will not do this, like my system to be all English.
- Change time zone. I’ll choose Europe / Stockholm.
- Then go update and answer “y” to any questions.
All below will take less time if overclock procedure are done in advance:
Then write sudo apt-get update; sudo apt-get upgrade, when finished reboot by typing: sudo reboot. If you would like to shut down system: sudo halt
At next startup change Root password by: sudo passwd root. There after change user password for user pi by: sudo passwd pi.
Good to have installed:
- Type: sudo apt-get install geany (code/programmer software)
- sudo apt-get install git-core (software hub)
- sudo apt-get install ftdi-eeprom (usb to RS-486/232 drivers)
Overclock
When updated you might want to try overclock your little Pi.
Write: sudo rasp-configure (sudo, so you get the super user rights). Choose overclock, I would recommend caution here. Start with Modest and then Finish, reboot the system. Re-logon with login: pi, password: your password. Work your way up the overclock range by go into the rasp-configure again. If your Pi won’t start, you know you went too far.
If the Pi doesn’t start, remove the SD card and connect it to a Windows platform. Open the “config.txt” change where it says: arm_freq=950 to #arm_freq=950. The figure”950” may wary in your case.
Firmware Update
Now when the system software is up to date we’ll update the firmware:
- Type: sudo wget http://goo.gl/1BOfJ -O /usr/bin/rpi-update && sudo chmod +x /usr/bin/rpi-update
- sudo rpi-update (this might take a while)
- sudo reboot
Setup XBee’s
Install Digi X-CTU on your Windows platform. Connect an XBee dongle with an XBee module, open the program and select Modem Configuration. Press Download new versions, select: XB24-ZB, ZIGBEE COORDINATOR API, 21A7, press Write, when finished Read. Write down the Serial number High (SH) 13A200 and Serial Number Low (SL) 407C4542. The Coordinator is the Boss, and receiver.
Same procedures go with the second XBee, but choose ZIGBEE ROUTER AT, 22A7. Write then Read and go down to DH/DL (Destination Address), insert SL/SH from the other module here. Done!
Open two X-CTU Terminals by open the program twice, one for each XBee module. Print some words in the Router module Terminal and see it be received at the Coordinators Terminal.
Close Router terminal, if your Pi is still up and running type “sudo halt” and attach the router XBee to the Pi. Startup and login, write: echo Hello World! > /dev/ttyUSB0 (if that don’t work, try USB1).
Have a look at the X-CTU Terminal window for the Coordinator and see the magic!
Additional Setups
Tools needed for RTC, ADC and other i2c hardware
Perform this as user Pi and not root.
- Type: sudo apt-get install i2c-tools
- modprobe i2c-bcm2708 (this is a start command of module)
- modprobe i2c-dev
- nano /etc/modules
– add i2c-dev in the end of file
Hold ctrl + O (save to file), press enter then ctrl + X (quit nano) - nano /etc/modprobe.d/raspi-blacklist.conf
Comment out blacklist i2c-bmc2708 with a #
Ctrl + O, ctrl + X - sudo adduser $USER i2c
- sudo git clone https://github.com/quick2wire/quick2wire-python-api.git
- sudo nano ~/.profile
-add at end of file:
export PYTHONPATH=$PYTHONPATH:$HOME/quick2wire-python-api/src - Ctrl + O, ctrl + X
- Sudo reboot
If logged in as root, the path added to ~/.profile has to be changed.
AB electronics Pi RTC
Warning: Do not connect the RTC Pi to your Raspberry Pi when the power is connected without a CR2032 battery installed. This can cause damage to the DS1307 RTC chip.
- echo ds1307 0x68 > /sys/class/i2c-adapter/i2c-0/new_device //FOR REV1 BOARDS OTHERWISE -> i2c-1
- hwclock –systohc (copy system time to hardware RTC)
- hwclock –r (read hardware RTC time)
- hwclock –s (set system time from RTC)
- sudo wget http://www.andrewscheller.co.uk/adc_demo.py
- sudo xhmod +x adc_demo.py
- ./adc_demo.py (./ to run program)
- Ctrl + C (quit program)
AB electronics Pi ADC
- sudo wget http://www.andrewscheller.co.uk/adc_demo.py
- sudo xhmod +x adc_demo.py
- ./adc_demo.py (./ to run program)
- Ctrl + C (quit program)
Hjelmslund USB-485
[To do]
Mono
Remember to choose soft-float distributions of the system. Often distros are of type hard-float.
- sudo apt-get install mono-complete
- sudo wget http://gruffman.se/rpi/net/RPi.Time.Net.exe
- mono RPi.Time.Net.exe
If this small program does not show correct date, then a hard-float distro is installed, see OS Setup for installing a soft-float.
The project can be downloaded from here: http://gruffman.se/rpi/net/RPi.Time.Net.zip
[codesyntax lang=”c” lines=”normal” lines_start=”0″]
using System;
using System.Threading;
using System.Timers;
/*
 * Reference: http://msdn.microsoft.com/en-us/library/system.timers.timer.aspx
 */
namespace SampleApp
{
    classProgram
    {
        static void Main(string[] args)
        {
            Console.Clear();
            Console.SetCursorPosition(0, 0);
            try
            {
                // Create a timer with two second interval
                System.Timers. Timer PollTimer = new System.Timers.Timer(2000);

                // Hook up the Elapsed event for the timer.
                PollTimer.Elapsed += newElapsedEventHandler(OnTimedEvent);
                PollTimer.AutoReset = true;
                PollTimer.Enabled = true;
            }
            catch (Exception e)
            {
                // Something has gone wrong, log and terminate application
                Console.WriteLine("threadTimeWriter._Exception Error: " + e.Message);
                // Throw the exception to force service to shut down
                throw;
            }
            // Wait for program termination
            Console.WriteLine("Press the Enter key to exit the program.");
            Console.Read();
        }
        // Specify what you want to happen when the Elapsed event is raised.
        privatestaticvoid OnTimedEvent(object source, ElapsedEventArgs e)
        {
            Console.WriteLine("The Elapsed event was raised at {0}", e.SignalTime);
        }
    }
}
[/codesyntax]
Mono program run as a service (daemon)
In this case we will have a .Net code running under mono. If we want it to work as a service (windows language) or better to say as a daemon (unix language), we should install supervisor and a small program to test it on.
- Create a folder under /home named daemon and enter the catalog
- Sudo wget http://gruffman.se/rpi/net/CSWindowsService.exe
- Sudo apt-get install supervisor
- Create mydaemon.conf under /etc/supervisor/conf.d/
- Edit mydaemon.conf to this:
[program:mydaemon]
command=mono-service CSWindowsService.exe –no-daemon
directory=/home/pi/daemon/
user=root
stdout_logfile=/home/pi/daemon/super_out.log
redirect_stderr=true - Then sudo service supervisor stop, wait a sec, then run sudo service supervisor start
- Confirm that process started by run: ps aux|grep mono
The program should output a log file in: /var/log/ called RPi.Time.File.Net.txt
For more reading: http://mattdeboard.net/2012/10/19/how-to-run-windows-service-as-linux-daemon/ and http://supervisord.org/
Source code can be found under: http://gruffman.se/rpi/net/CSWindowsService.zip
Instructions for that altered code can be found at: http://code.msdn.microsoft.com/windowsdesktop/CSWindowsService-9f2f568e
Pseudo Dropbox
I don’t recommend this solution anymore, please have a look at WinSCP!
This assumes you have a Dropbox Account.
- sudo git clone https://github.com/andreafabrizi/Dropbox-Uploader.git
- sudo chmod +x dropbox_uploader.sh
- startx
- Open Accessories/LXTerminal
- dropbox_uploader.sh
- Double click the address (copy) and past into web browser Midori
- Follow the instructions in the Terminal window (use mouse to copy/past phrases)
Usage example:
Create a text file in Dropbox/Apps/MyUploader573031874/mobo.txt (windows computer) and past some contents.
At Raspberry:
- ./dropbox_uploader.sh list
- ./dropbox_uploader.sh download mobo.txt
- ls
Tip: If this is a way of developing in windows environment and past files to Raspberry, do configure your program so created/compiled files are saved directly in the Dropbox folder.
WinSCP and putty instead of Dropbox solution
I will presume that you are aware of the RPi’s IP address ( run ifconfig otherwise).
- Install WinSCP on your Windows machine: http://winscp.net/
- And get Putty: http://www.chiark.greenend.org.uk/~sgtatham/putty/download.html
When up and running, under settings, applications you could set the path to putty.exe If you want me to elaborate this section more, please send me an email.
References
Dropbox Uploader: http://www.andreafabrizi.it/?dropbox_uploader
AB Electronics UK: http://www.abelectronics.co.uk/
RPi ADC I2C Python: http://elinux.org/RPi_ADC_I2C_Python
Raspberry Pi Downloads: http://www.raspberrypi.org/downloads